Showing posts with label Crafts. Show all posts

Thursday, September 29, 2011

A Faux Fox Stole Tutorial!

Here's a wonderful and funky tutorial I found over at Craftster.
This post is by a wonderful crafter named p.kok and I absolutely love this faux fox stole!
To see this post on the original site just click the link

I can see many of these in my future.  I can't wait to go look at fabric.  Can you just imagine what you could make?  Oh, my!

-------------------------------------------------------------------------------------------------------------


I wanted it to have eyes, but i couldn't find them in any store in town (i orderd some form etsy, since I plan to make more of those scarfs), but i kinda like it the way it turned out.


If you want, i can make a tutrial and post the pattern for the head in the next days. C&C very welcome

edit: THE TUTORIAL!

1. cutting the fabric:
You will need approximately half a yard of some soft warm fabric like wool (fake fur would also probably work pretty well). So first you cut out two head shapes and two rectangles. the rectangles should be around 15 cm wide and the length depends on your wishes (or on the width of the fabric you chose, if you actually bought just half a yard:)). Then you fold the rectangles in half. (you can cut both at once if you have scissors good enough to cut though 4 layers of fabric). Cut them as shown on the picture (that is really really bad, but stupid illustrator won't work so i had to use paint instead:))).


also a "pattern" for the head. just copy it to a word document and size it the way you like.


2. embelishing

If you want to put eyes or noses or any other embellishments on anything (like contrasting fabric on the paws or on the tail) or do any embroidery, do it now (so the stitches won't show later).

3. sewing

put the right sides of the fabric pieces for the head together and sew almost all the way around- leave a gap to turn everything inside out. Then turn everything inside out, iron it and top stitch around the edge and close the gap that was left. Now do the same with the body. Sew the head to the body and voila- you're done!:)

*i hope you understood everything- english is obviously not my first language:) if you have any questions, feel free to ask:)
Enhanced by Zemanta

Monday, August 1, 2011

Watercolors to go -- from Tip Junkie

Here is a wonderful tutorial for a wonderful idea!  This is something I want to try myself because maybe if I have this handy, I will be able to grab those moments when I feel inspired.  As it is, those moments are simply lost while I try to find things, or set up a place to work, or something. 

This is a great handmade gift to give to any children on your Christmas list, too.  I know I would have loved to receive one of these when I was younger.  Think how many hours of use this little kit will get from the busy and creative imagination of a child.

Hope you like it.  Hope you try it.  If so, leave me a note about the process, won't you?  You can visit the original site here to check out other ideas.

_________________________________________________________________________________


Every winter my dear friend Catherine Newman gives my kids the most inspired gifts- both handmade and boughten.  Last year she gave Ava a fantastic book called An Illustrated Life, a book about illustrated journaling and sketchbooking and it was a huge source of inspiration for her.  When I get her permission, I will post some things she has been working on, but for now I will share with you a little gift that I am currently making for her as she fills her personal sketchbook with beautiful and funny and original work of her own.  There was an idea for this in the book that an artist shared that I have changed a bit but it will allow her to carry water colors with her and as long as she can find some water (usually not difficult) she can transform her black line drawings into something even more spectacular.  And, it's easy, to boot.
  1.  a metal tin (I used a tin that a pair of scissors came in, which was a perfect fit for the "fantastix") polymer clay (sculpey or fimo- go for the soft type).
  2. tubes of watercolors (I went for the cheap type from Michael's for this first try but you could use fancy ones)
  3. Coloring tools such as "fantastix", which are inexpensive and you can find at any art or craft store. They are basically pens without the ink.  The body is filled with a sponge that holds water so you fill it with water and then can use it with the water colors without having a jar of water for your paintbrush.  You could even watercolor in the car!
  4. White metal paint OR a piece of white plastic cut from a tofu or yogurt container that is large enough to fill (or mostly fill) the top of the tin (this is for mixing colors- you want white for that).
  5. A tube of lip balm (you'll see why).
How to make it:
  1. Take one pack of white polymer clay and break in half.  Roll each half into a snake as long as your tin.

Smoosh them so they are flattened along both long sides and then take your lip balm and press 6 wells into each smooshed snake of clay (use the top of the lip balm that is flat).


2. Follow the manufacturer's directions and bake the clay inside of the tin.  After this cools, you can fill the wells with paint.
3. Fill the wells with paint.  Tap the whole thing to flatten the paint into the wells, or use something (like a paintbrush) to flatten it.  Allow this to dry and it will be ready to use.


4. Paint the top of the lid with white metal paint or glue in a piece of white plastic to provide a white area to mix colors.

5. Now it is ready to go.  If you need to, tie a piece of string or use a rubberband to keep the lid secure.  

If you can't find a long tin like this one, you could always just carry the color sticks in your pencil/pen bag.


Enhanced by Zemanta

Monday, March 28, 2011

Still working on Easter decorations

Although I am still working feverishly on my own Easter Swags for the windows in my nurses' station at work, I don't have any new pictures because I split the cutting out of my figures with my friend, Bethany.  She is going to help me because I need so many figures to make a swag for each window.

Because I don't have anything new on my swag, I thought I would post this tutorial from Dana-made-it.com.  She has many wonderful tutorials on her site, so please visit and let her know that I sent you.

-----------------------------------------------------------------------------------------------------------------------------

7.01.2008

TUTORIAL: PEEPS Bunny Bunting and Door Hangers

Ready for Easter?
If you've got a Sunday morning brunch up your sleeve.....
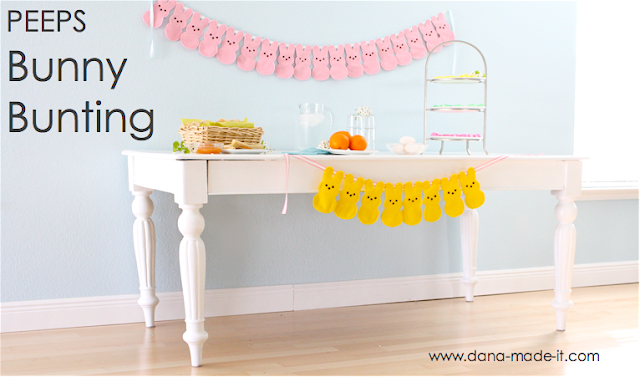
Don't forget the PEEPS!
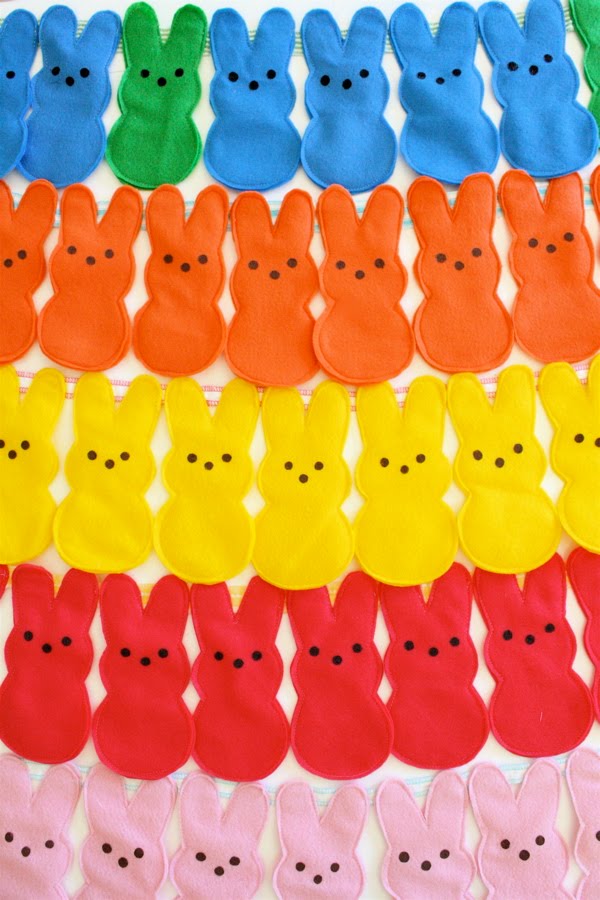
Nothing says Easter like a bunch of colorful bunnies.
And since buntings are festive any time of the year, I took a spin on the traditional flag look and mimicked a childhood favorite in our family.....Marshmallow Peeps.
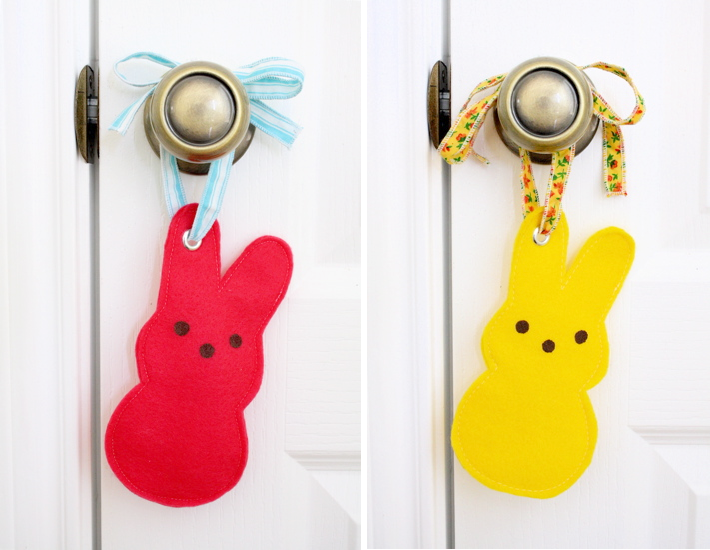
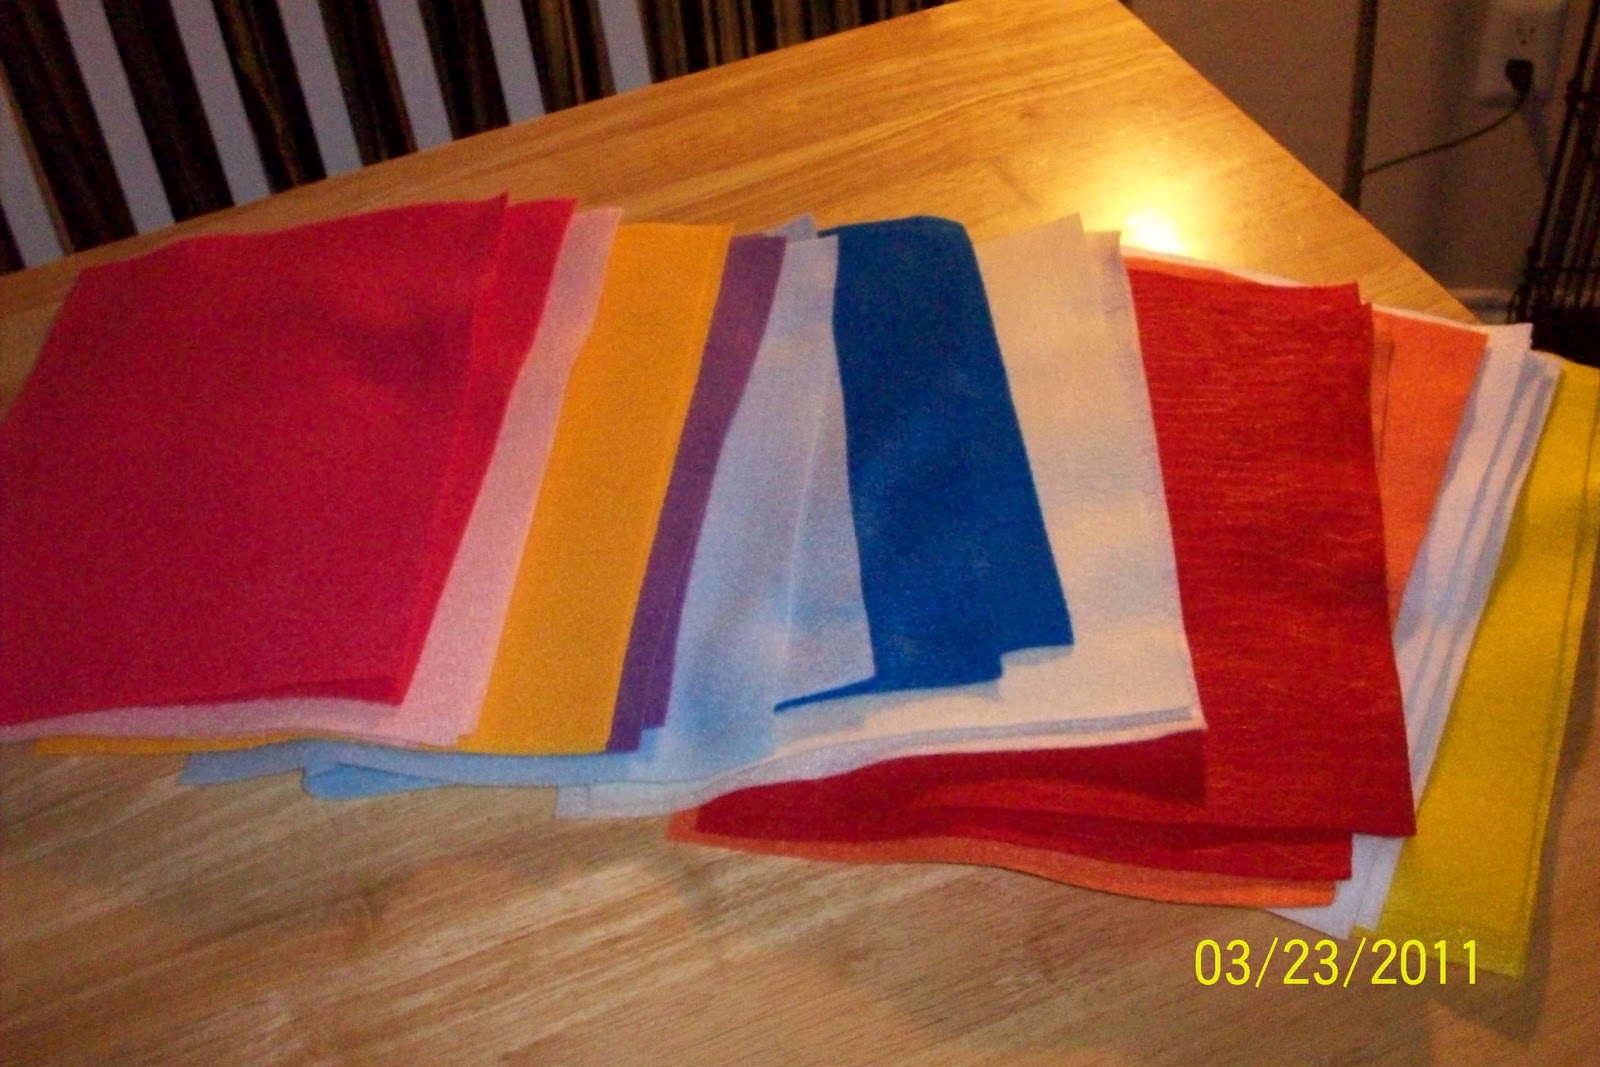
Pick your favorite Peeps color (or make up your own!) and find a similar FELT color at your local craft store. Then, keep it super simple with Bunny Door Hangers:
or really give-in to your sweet tooth.....
And let's get bunting!

Skill Level: Any
Needed:
* 1/2 yard or less of felt (doesn't need to be anything fancy)
* brown fabric paint
* pencil (or other round object)
* ribbon/fabric for bunting
* sewing machine

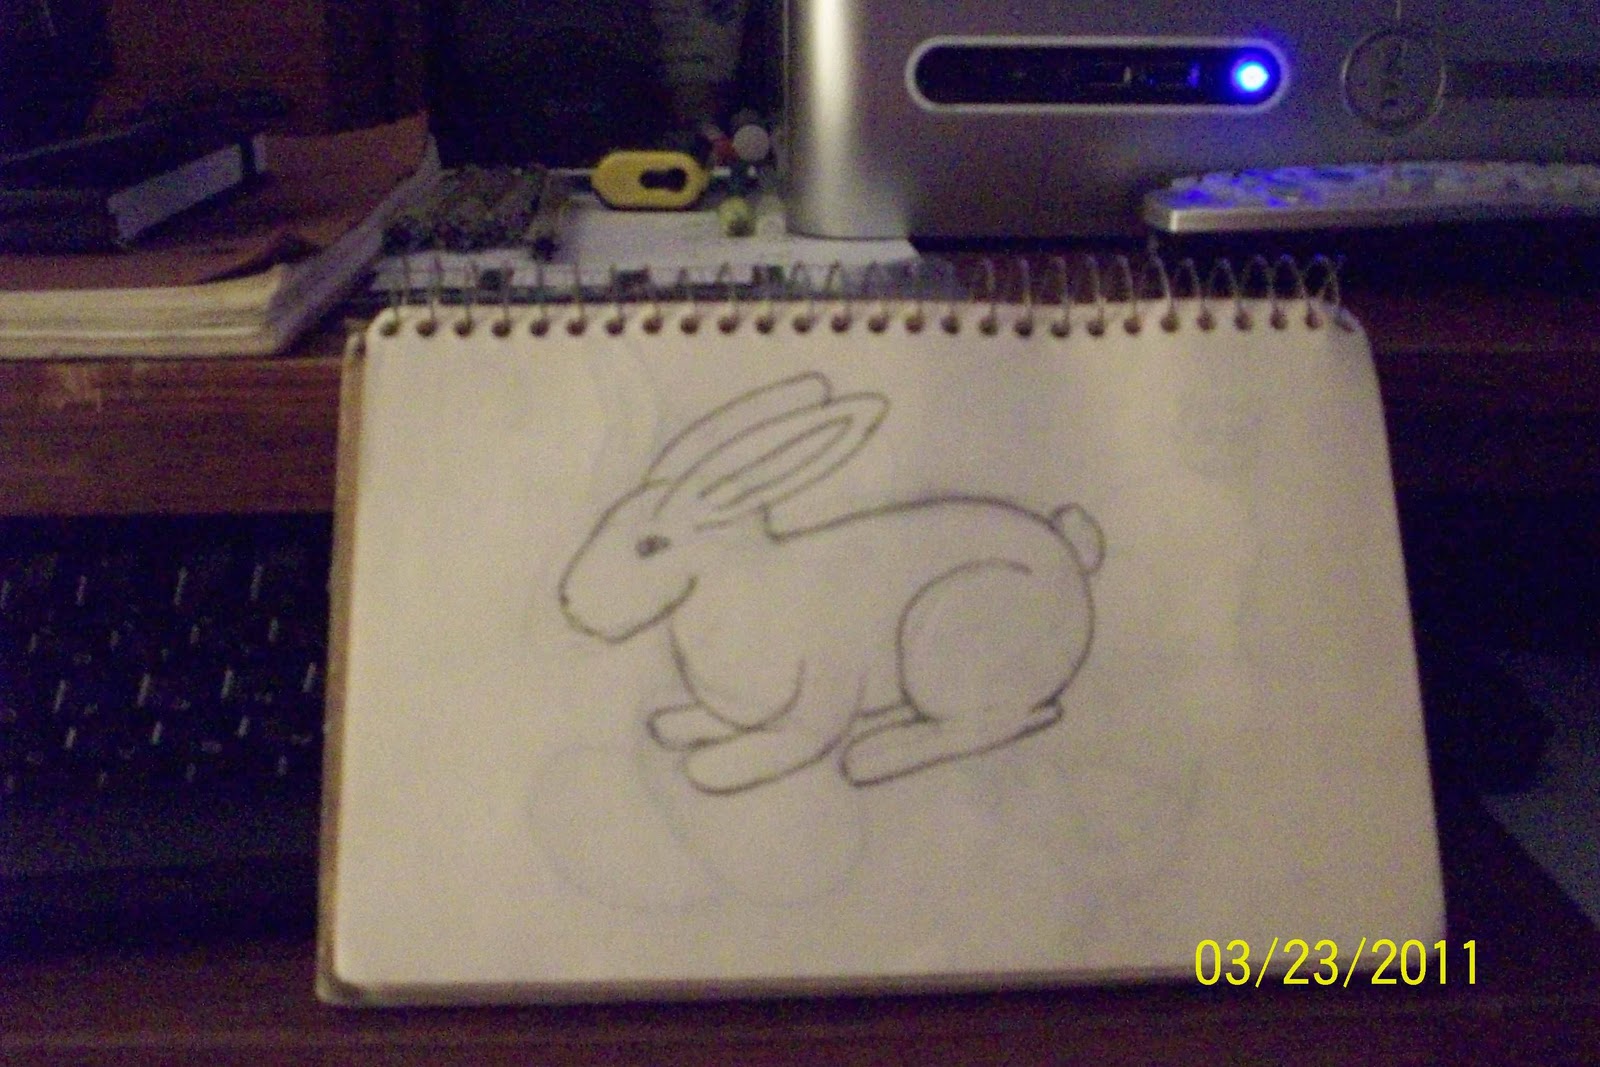
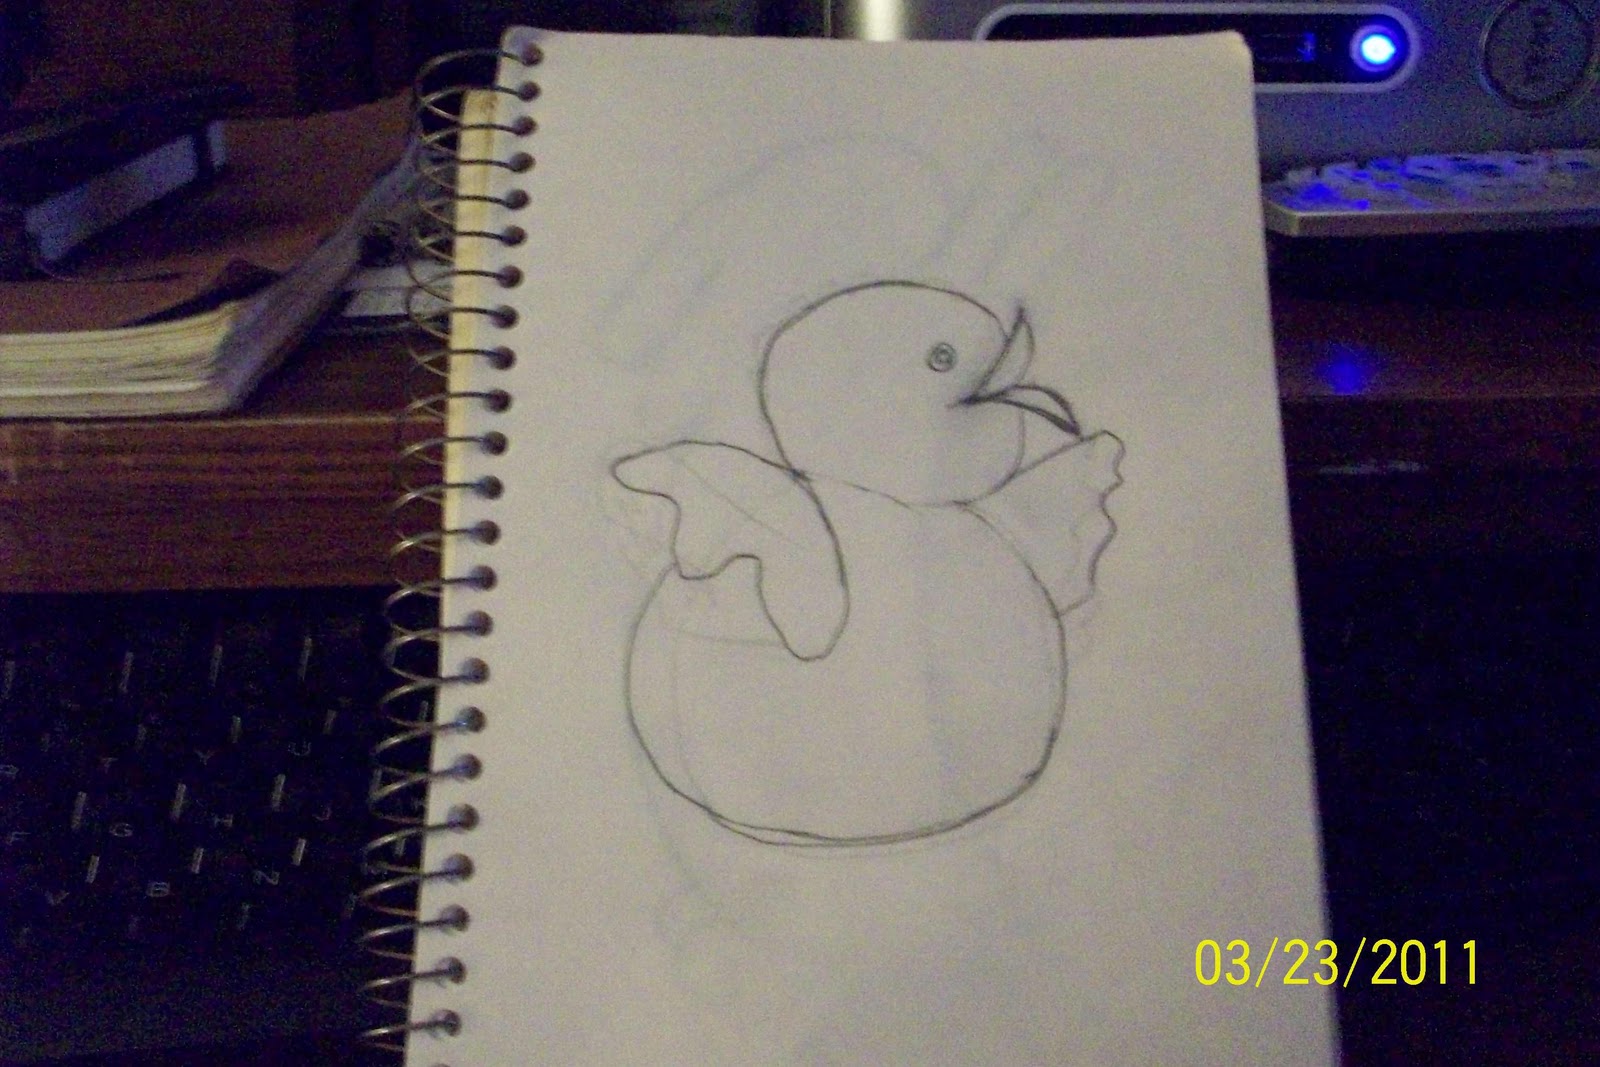
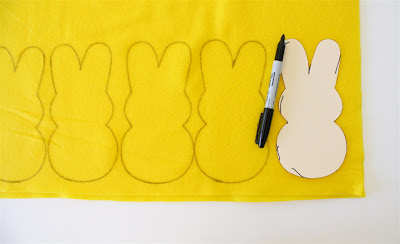
First, cut out your pattern. I've created one here for you. If you don't have a printer, just put a piece of paper up to your computer screen and trace the image right on top!
or.....

You can copy the Bunny Bunting Pattern TWO ways:
1. Click on the image below to enlarge. Then "save as" to you computer. Open it in a Word doc and insert the picture so you can adjust the size for your needs.

2. Grab the PDF pic by clicking HERE.

Okay, with your bunny pattern printed and cut out (I usually print on paper and then trace/cut an additional pattern out of cardstock or from a file folder. MUCH easier to trace around a stiffer bunny over and over again).

Fold your felt in half (because each bunny is a double-layer). You can make them single layered if you want the cheap/easy way. But it's less polished looking and a bit see-through. So I recommend double-layers.
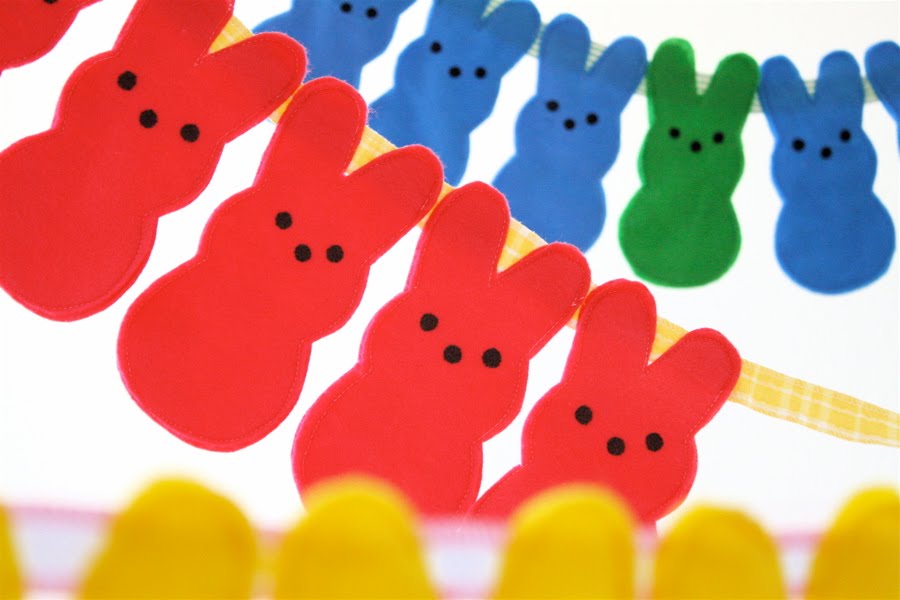
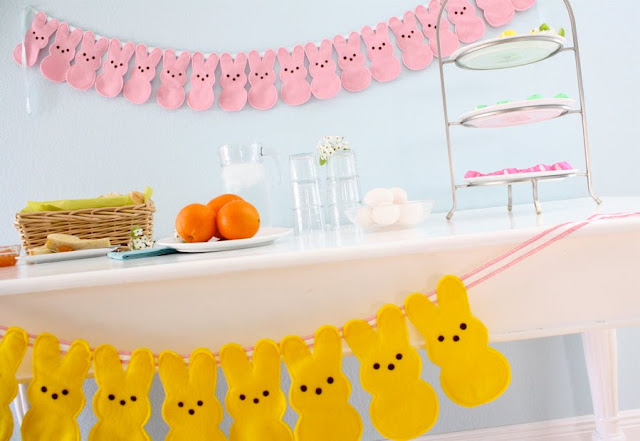
Then trace and cut out as many bunnies as you'd like. The pink bunting has 18 bunnies. The small yellow bunting has 9:
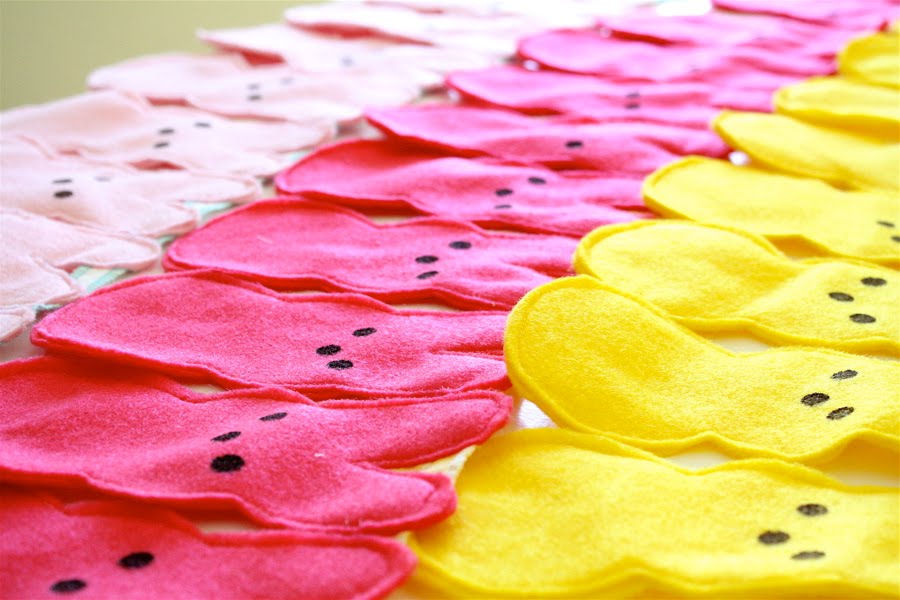
Time to decorate their faces. You'll only be decorating the front bunnies (the back bunnies are left plain). You'll need a pencil eraser or something round. And brown fabric paint. I prefer Tulip brand, Matte, Chocolate. Its cheap, $1.50 at most craft stores.
Dip your pencil eraser in the paint, and dab it right onto each bunny. The beauty of Peeps is that they're far from perfect. If you look at a box, each face is slightly different. So don't worry about being precise or even symmetrical! If you want them to look like the real Peeps, space their eyes very far apart. It will feel strange. But their eyes are far apart and their nose if very high-up, close to the eyes. Look at the photos above of the real peeps for reference.

Make sure you place a piece of paper under your bunny because paint may seep through to the back.
Starting to see a resemblance......?
Let your bunnies dry for a hour or longer. If you're antsy, you can speed up the process by drying them with a blow dryer, but be careful that they don't fly all over the place!

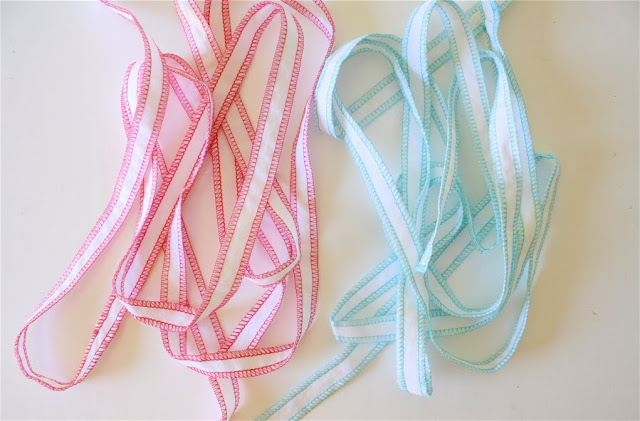
While you're waiting for the faces to dry, prep your bunting ribbon. You can use fabric, ribbon, rope, colorful twine (THIS stuff is totally cute). My favorite method for making "ribbon" is to cut strips of fabric (I used double-layered white muslin in this case), sew the strips together to make a very long strip, and then I serge the edges. Perfect for wrapping gifts and in this case, for making a bunting. Each finished "ribbon" is about 100 inches long but that was much longer than needed.
Time to sew on your bunnies.
If you want the quick and easy way, grab a bunny back and a bunny front and sew that double-layered bunny to your ribbon and keep on going till you're bunnied out.

But if you want the slightly longer method that I did (it only took a bit longer)...
I sewed each bunny back on to the ribbon while the faces were drying. Just lay one down and sew across the ears:
Then grab the next bunny back and repeat:
Sewing the backs on first makes the bunting a bit stronger, the bunnies are likely to be straighter, and it's more polished looking. After sewing the back bunnies on by their ears, you sew the front bunnies on top, sewing an outline around each one.

(Okay, okay...so I was just bored and couldn't wait to get started while those blasted faces were drying! Either method you use, your bunnies will look great.)
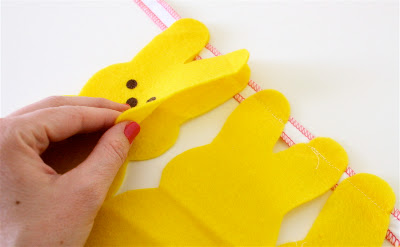
Here's where I laid the front bunnies on top of the back bunnies and sewed all the way around each one. Repeat this step till all your bunnies are on!
and, you're done!
Enjoy your party!

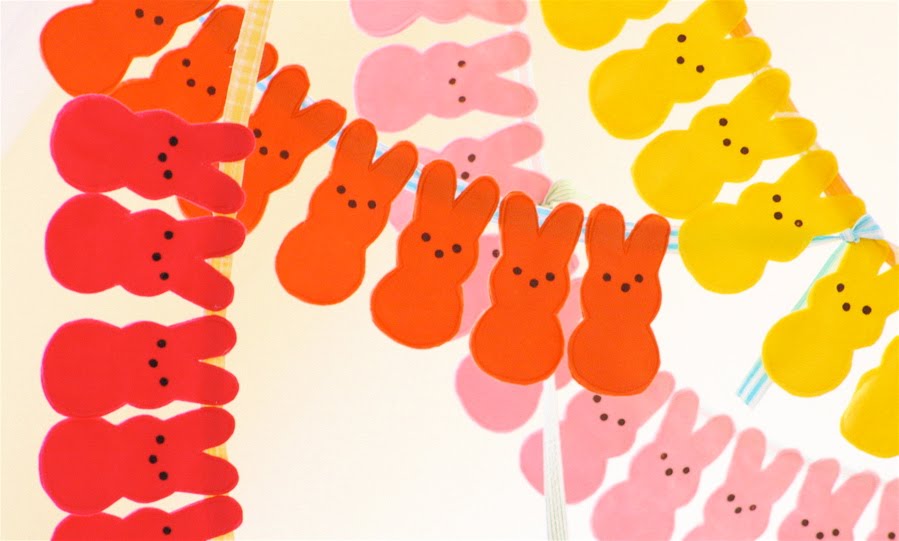
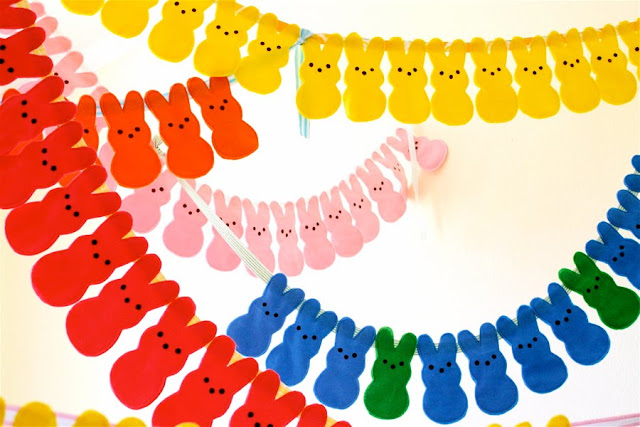
Try your buntings in vibrant colors also. Makes me want to throw confetti and eat cupcakes:
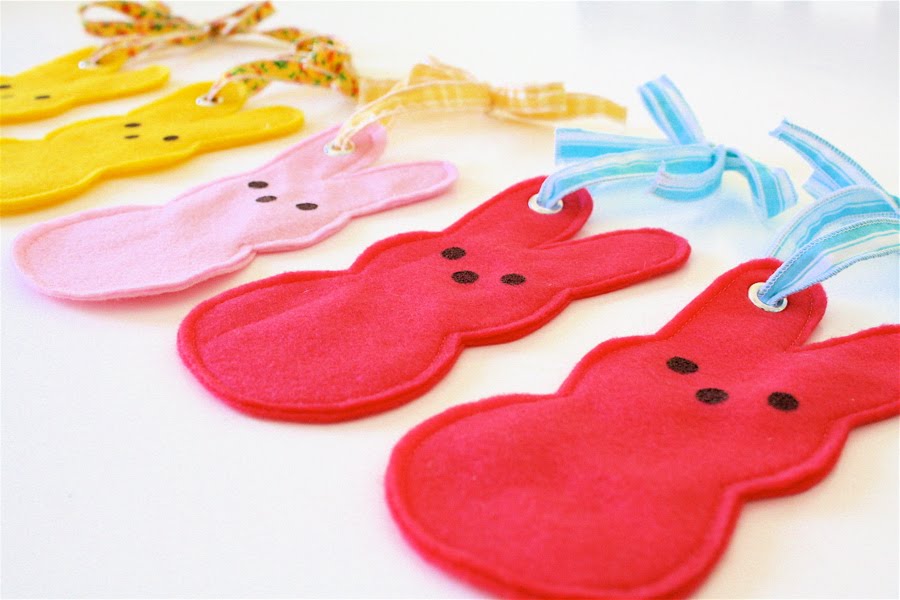
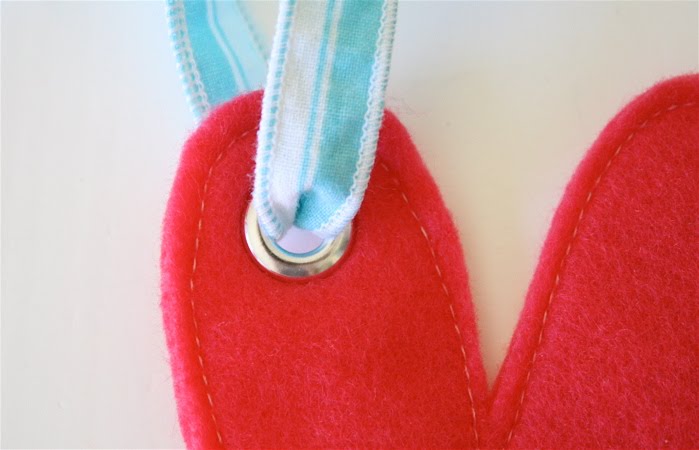
Or make Bunny Door Hangers! Perfect gift for a teacher or friend:
Just add a metal Eyelet to the ear and a cute homemade ribbon (if you're not sure how to do Eyelets, they are super easy. Check out the Split Pea Shamrocks Tutorial for all the info):
And hang them up!
Happy Easter!
Enhanced by Zemanta

Wednesday, March 23, 2011

I've started working on my Easter swag

Since I need to get started on my Easter swag because time is short and I need quite a length of final swag, I decided to get right on it.


Here are some of the sketches I made for the individual figures of the swag.  As I said before, I want to have bunnies, chicks, and easter eggs all sewn together in pastel colors. 

With that in mind, I went to JoAnn's and brought back some pastel and bright felt squares to use to make my figures. 

I
Enhanced by Zemanta

Why Are Orcas Attacking Boats?

Recently I have been reading articles and news about Orcas attacking boats and causing quite a bit of anxiety.  Since these whales hunt in p...